一、直接使用我们提供的测试服务端
为了方便起见,我们打开一个http网站,打开控制台,注入以下代码
- 请注意,如果你是https站点请将
ws修改为wss并且配置相关证书
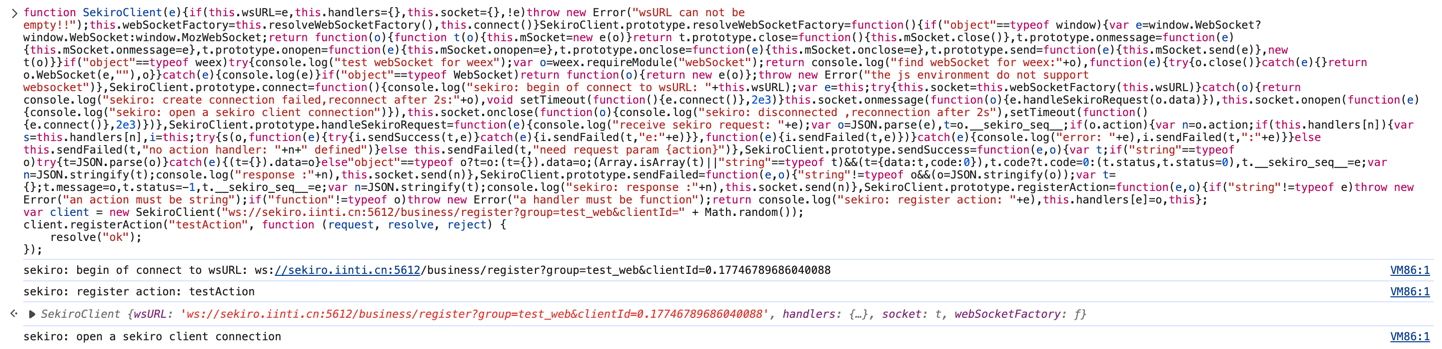
function SekiroClient(e){if(this.wsURL=e,this.handlers={},this.socket={},!e)throw new Error("wsURL can not be empty!!");this.webSocketFactory=this.resolveWebSocketFactory(),this.connect()}SekiroClient.prototype.resolveWebSocketFactory=function(){if("object"==typeof window){var e=window.WebSocket?window.WebSocket:window.MozWebSocket;return function(o){function t(o){this.mSocket=new e(o)}return t.prototype.close=function(){this.mSocket.close()},t.prototype.onmessage=function(e){this.mSocket.onmessage=e},t.prototype.onopen=function(e){this.mSocket.onopen=e},t.prototype.onclose=function(e){this.mSocket.onclose=e},t.prototype.send=function(e){this.mSocket.send(e)},new t(o)}}if("object"==typeof weex)try{console.log("test webSocket for weex");var o=weex.requireModule("webSocket");return console.log("find webSocket for weex:"+o),function(e){try{o.close()}catch(e){}return o.WebSocket(e,""),o}}catch(e){console.log(e)}if("object"==typeof WebSocket)return function(o){return new e(o)};throw new Error("the js environment do not support websocket")},SekiroClient.prototype.connect=function(){console.log("sekiro: begin of connect to wsURL: "+this.wsURL);var e=this;try{this.socket=this.webSocketFactory(this.wsURL)}catch(o){return console.log("sekiro: create connection failed,reconnect after 2s:"+o),void setTimeout(function(){e.connect()},2e3)}this.socket.onmessage(function(o){e.handleSekiroRequest(o.data)}),this.socket.onopen(function(e){console.log("sekiro: open a sekiro client connection")}),this.socket.onclose(function(o){console.log("sekiro: disconnected ,reconnection after 2s"),setTimeout(function(){e.connect()},2e3)})},SekiroClient.prototype.handleSekiroRequest=function(e){console.log("receive sekiro request: "+e);var o=JSON.parse(e),t=o.__sekiro_seq__;if(o.action){var n=o.action;if(this.handlers[n]){var s=this.handlers[n],i=this;try{s(o,function(e){try{i.sendSuccess(t,e)}catch(e){i.sendFailed(t,"e:"+e)}},function(e){i.sendFailed(t,e)})}catch(e){console.log("error: "+e),i.sendFailed(t,":"+e)}}else this.sendFailed(t,"no action handler: "+n+" defined")}else this.sendFailed(t,"need request param {action}")},SekiroClient.prototype.sendSuccess=function(e,o){var t;if("string"==typeof o)try{t=JSON.parse(o)}catch(e){(t={}).data=o}else"object"==typeof o?t=o:(t={}).data=o;(Array.isArray(t)||"string"==typeof t)&&(t={data:t,code:0}),t.code?t.code=0:(t.status,t.status=0),t.__sekiro_seq__=e;var n=JSON.stringify(t);console.log("response :"+n),this.socket.send(n)},SekiroClient.prototype.sendFailed=function(e,o){"string"!=typeof o&&(o=JSON.stringify(o));var t={};t.message=o,t.status=-1,t.__sekiro_seq__=e;var n=JSON.stringify(t);console.log("sekiro: response :"+n),this.socket.send(n)},SekiroClient.prototype.registerAction=function(e,o){if("string"!=typeof e)throw new Error("an action must be string");if("function"!=typeof o)throw new Error("a handler must be function");return console.log("sekiro: register action: "+e),this.handlers[e]=o,this};
var client = new SekiroClient("ws://sekiro.iinti.cn:5612/business/register?group=test_web&clientId=" + Math.random());
client.registerAction("testAction", function (request, resolve, reject) {
    resolve("ok");
})
如图所示成功建立了websocket连接
然后在浏览器访问jsPRC链接
http://sekiro.iinti.cn/business/invoke?group=test_web&action=testAction¶m=testparm
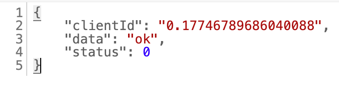
可以看到返回的data数据确实和注入代码的resolve("ok")对应,换言之,你也可以在注入代码里替换成别的~
二、自己搭建
1. 服务端安装
sekiro 支持三种安装方式:
- 从 docker 安装
- 使用 docker compose
- 本地手动安装
具体可以参考官方文档:https://iinti.cn/sekiro-doc/01_manual/4.server_install.html
本文主要介绍第一种。这种方法好处就是方便快捷,也有一些局限,从官方文档中抄了一段分析
docker 一键安装的方式不需要配置环境,只需要你的 Linux 服务器存在 docker 环境既可一键拉起。
他的缺点就是稳定性稍微差一点儿,如下:
- sekiro 存在两个进程:mysql 数据库 + java 的服务,正常情况下最佳实践上一个 docker 镜像仅关联一个确定的进程,否则进程 crash docker 容器无法感知。
- 无法完成分布式扩容,由于是 all in one 的方式启动,docker 一键启动方式数据库被隐藏到内部,无法部署多个节点,并且让节点共享数据库。
当然实际上我认为单一服务器本身已经足够支持高的并发压力了,我认为单一 docker 节点也足够正常使用了。
- 第一步安装docker
yum install -y docker
- 第二步,下载镜像
docker pull registry.cn-beijing.aliyuncs.com/iinti/common:sekiro3-allInOne-latest;
- 第三步,启动sekiro服务器
docker run -d -p 5612:5612 -v ~/sekiro-mysql-data:/var/lib/mysql --name sekiro-all-in-one registry.cn-beijing.aliyuncs.com/iinti/common:sekiro3-allInOne-latest
至此,docker容器的服务端已经启动,运行在5612端口。
可以浏览器打开管理界面http://服务器ip:5612进行验证,例如:http://127.0.0.1:5612
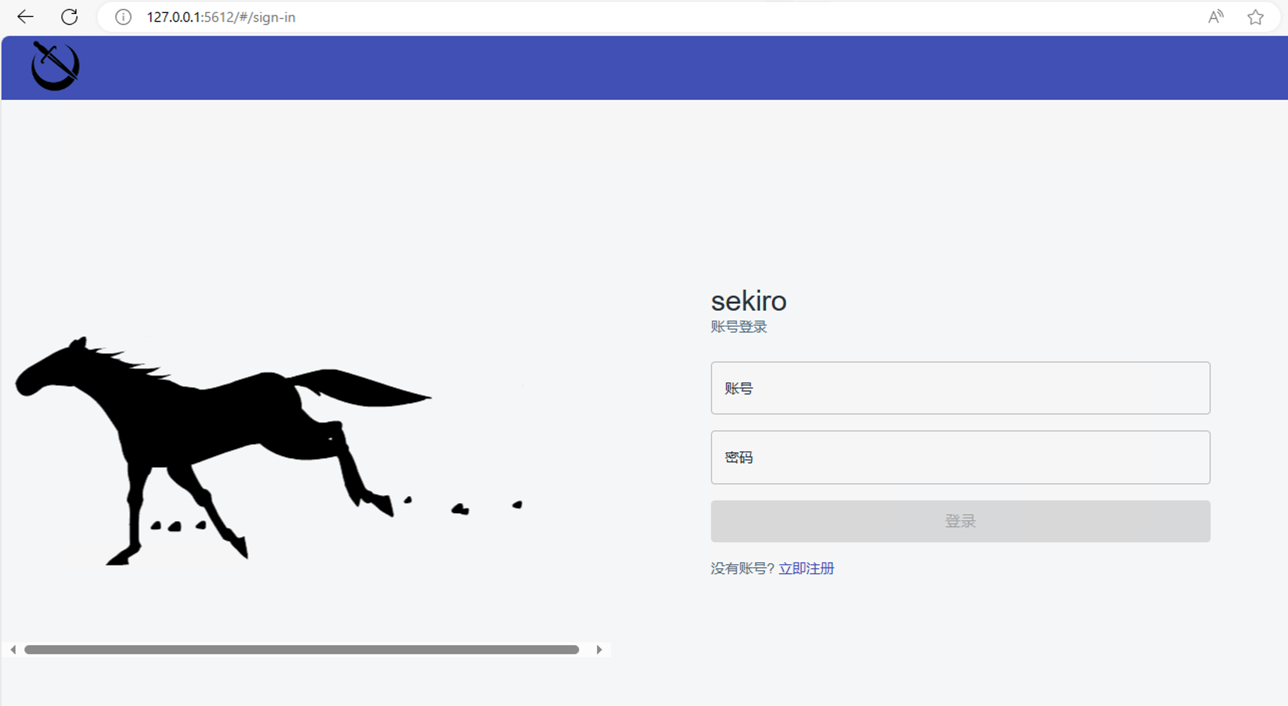
正常可以顺利进入管理系统。
2. 一些界面操作
- 账号注册: 在上一步骤的界面可以进行账号注册,第一个注册的账号将成为管理员。
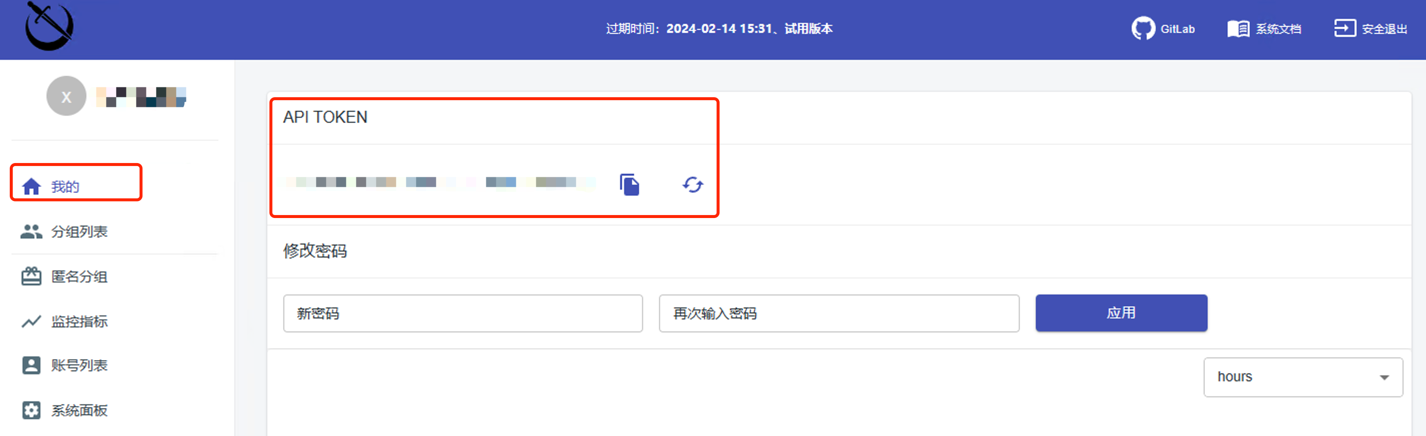
- 了解自己的token:
用户信息主界面可以看到自己的账号的token
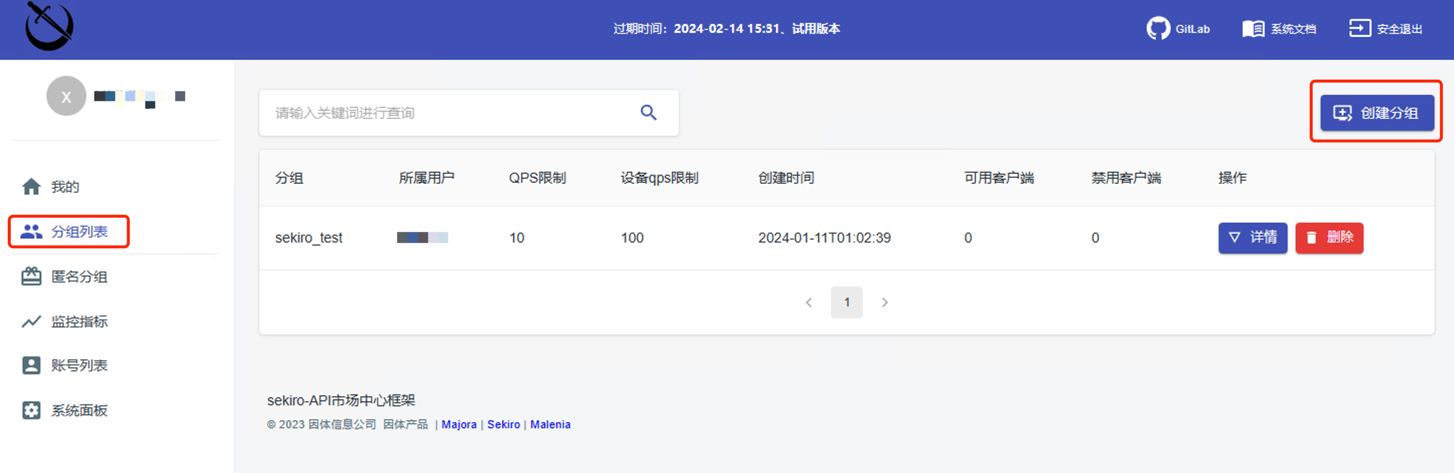
- 创建分组:
在分组列表可以创建分组
3. 浏览器注入
为了方便起见,我们打开一个http网站,打开控制台,注入以下代码
function SekiroClient(e){if(this.wsURL=e,this.handlers={},this.socket={},!e)throw new Error("wsURL can not be empty!!");this.webSocketFactory=this.resolveWebSocketFactory(),this.connect()}SekiroClient.prototype.resolveWebSocketFactory=function(){if("object"==typeof window){var e=window.WebSocket?window.WebSocket:window.MozWebSocket;return function(o){function t(o){this.mSocket=new e(o)}return t.prototype.close=function(){this.mSocket.close()},t.prototype.onmessage=function(e){this.mSocket.onmessage=e},t.prototype.onopen=function(e){this.mSocket.onopen=e},t.prototype.onclose=function(e){this.mSocket.onclose=e},t.prototype.send=function(e){this.mSocket.send(e)},new t(o)}}if("object"==typeof weex)try{console.log("test webSocket for weex");var o=weex.requireModule("webSocket");return console.log("find webSocket for weex:"+o),function(e){try{o.close()}catch(e){}return o.WebSocket(e,""),o}}catch(e){console.log(e)}if("object"==typeof WebSocket)return function(o){return new e(o)};throw new Error("the js environment do not support websocket")},SekiroClient.prototype.connect=function(){console.log("sekiro: begin of connect to wsURL: "+this.wsURL);var e=this;try{this.socket=this.webSocketFactory(this.wsURL)}catch(o){return console.log("sekiro: create connection failed,reconnect after 2s:"+o),void setTimeout(function(){e.connect()},2e3)}this.socket.onmessage(function(o){e.handleSekiroRequest(o.data)}),this.socket.onopen(function(e){console.log("sekiro: open a sekiro client connection")}),this.socket.onclose(function(o){console.log("sekiro: disconnected ,reconnection after 2s"),setTimeout(function(){e.connect()},2e3)})},SekiroClient.prototype.handleSekiroRequest=function(e){console.log("receive sekiro request: "+e);var o=JSON.parse(e),t=o.__sekiro_seq__;if(o.action){var n=o.action;if(this.handlers[n]){var s=this.handlers[n],i=this;try{s(o,function(e){try{i.sendSuccess(t,e)}catch(e){i.sendFailed(t,"e:"+e)}},function(e){i.sendFailed(t,e)})}catch(e){console.log("error: "+e),i.sendFailed(t,":"+e)}}else this.sendFailed(t,"no action handler: "+n+" defined")}else this.sendFailed(t,"need request param {action}")},SekiroClient.prototype.sendSuccess=function(e,o){var t;if("string"==typeof o)try{t=JSON.parse(o)}catch(e){(t={}).data=o}else"object"==typeof o?t=o:(t={}).data=o;(Array.isArray(t)||"string"==typeof t)&&(t={data:t,code:0}),t.code?t.code=0:(t.status,t.status=0),t.__sekiro_seq__=e;var n=JSON.stringify(t);console.log("response :"+n),this.socket.send(n)},SekiroClient.prototype.sendFailed=function(e,o){"string"!=typeof o&&(o=JSON.stringify(o));var t={};t.message=o,t.status=-1,t.__sekiro_seq__=e;var n=JSON.stringify(t);console.log("sekiro: response :"+n),this.socket.send(n)},SekiroClient.prototype.registerAction=function(e,o){if("string"!=typeof e)throw new Error("an action must be string");if("function"!=typeof o)throw new Error("a handler must be function");return console.log("sekiro: register action: "+e),this.handlers[e]=o,this};
var client = new SekiroClient("ws://127.0.0.1:5612/business/register?group=xxxx&clientId=" + Math.random());
client.registerAction("testAction", function (request, resolve, reject) {
    resolve("ok");
});
其中,上述代码中group=xxxx需要替换为自己第二步中创建的分组名
然后我们在浏览器访问http://localhost:5612/business/invoke?group=sekiro_test&action=testAction&sekiro_token=xxxxx
其中,上述代码中group=xxxx和sekiro_token=xxxxx需要替换为自己的分组名和token

可以看到返回的data数据确实和注入代码的resolve("ok")对应,换言之,你也可以在注入代码里替换成别的~